Japanese Milk Bread
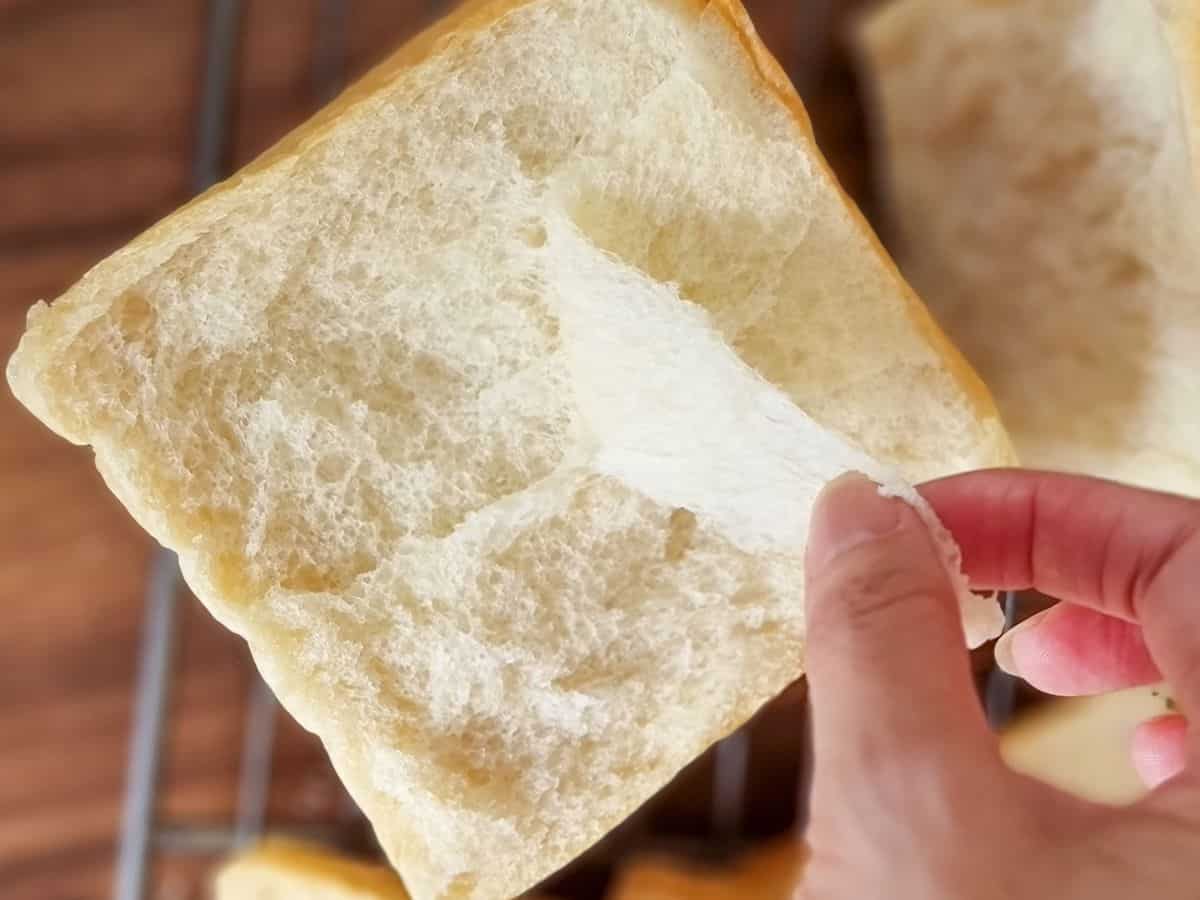
If you're looking for an easy, quick, and fluffy bread recipe then look no further! I'm going to show you how to make Japanese milk bread or "Shokupan" with a Japanese baking method called "Yudane." The result? A soft, fluffy, and delicious bread that you'll love to make.
Equipment
- 1 1 Bread Baking Tin(0.99LB, 450g dough capacity) Size: 21.1*12*11cm
- 1 Tub
- 1 Mixing Bowl
- 1 Bread Cutter
- 1 Oven
- 1 Rolling Pin
Ingredients
Yudane
- 25 g Bread Flour or Strong Flour
- 25 ml Boiled Water
Main Dough
- 250 g Bread Flour or Strong Flour(100%)
- 3 g Quick Yeast(1.5%)
- 3 g Salt(1.5%)
- 50 g Yudane(20%)
- 100 ml Milk(40%) If it is a warm day then just use room temperature milk, otherwise if its a cold day you should use warm milk around 25C-30C.
- 25 g Condensed Milk(10%) Room temperature
- 75 ml Water (30%) Same with milk
- 25 g Unsalted Butter room temperature(10%)
Instructions
Yudane
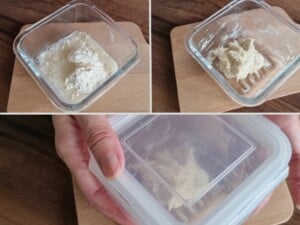
- In a bowl or sealable tub, add the flour and boiled water then mix well. Once all the flour has been combined, seal the tub or cover the bowl with wrap and allow to cool. Pop it in the fridge overnight.
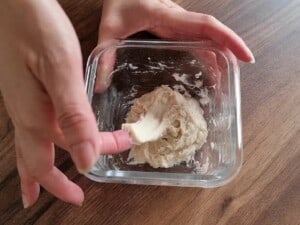
- Next day: Before you begin to make the bread, remove the yudane from the fridge and allow to come to room temperature.
Main Dough
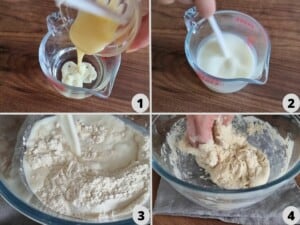
- In a mixing bowl add the bread flour, then in separate areas of the bowl add in the yeast & salt, then use your hand or spatula mix well, this is dry ingredients. Then add the yudane and milk into it.
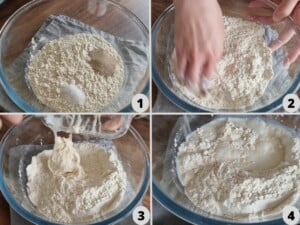
- Next add the condensed milk into water, mix well. Then add into the flour mixture, give it a good mix until there are no dry ingredients.
- Turn the dough out onto the work surface and start to knead it for 5 minutes or until the gluten has formed.
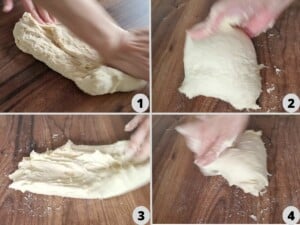
- Spread the dough and add the butter. Cover the butter with the dough then start to knead it again, it will become sticky and spread on the work surface. Use the bread cutter to gather the dough and continue to knead it for around 10 - 15 minutes or until it become smooth.
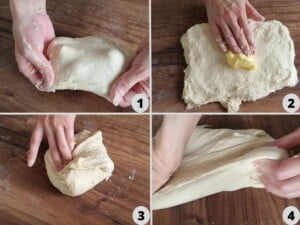
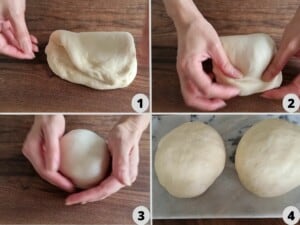
- Once the dough becomes smooth, check the gluten. Cut a piece of the dough and spread it very thin, if you can see your finger though the dough and it does not break easily, this means the gluten is ready. Next roll it into a ball and put it into a bowl and cover with wrap or a plastic bag to prevent to dough from drying out. Put it in a warm place to do the first ferment for 50 minutes or until it doubles in size.

- Once it becomes doubled in size, do finger test. Dust your finger with flour, and gently poke it into the dough, if the dough retains the finger hole when you pull your finger away, it is ready. If the dough springs back, let it rest longer. If the dough collapses then it has been rested too long.

- Dust some flour on the edge of the dough then use bread cutter to loose the dough, gently take it out and put it on the surface, then push the air out from the dough. Divide into 2 equal pieces.
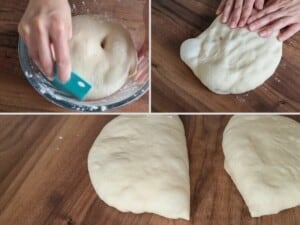
- Next roll each piece into a ball, then cover with the wrap, leave them to rest for 15 minutes.
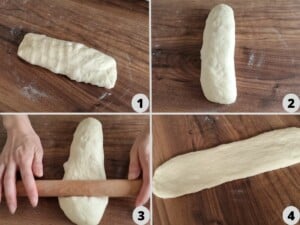
- Turn one bun over and flatten. Fold the top right of the dough one – third of the way towards the middle pressing it into the dough, then repeat it, the edge of the left third should be slightly past the centre line. If your dough is very sticky dust a little flour just enough not too much.

- Next flip and rotate the dough 90°, smooth side on the top, then put the rolling pin in the middle of the dough, roll out the dough away from you, rolling all the way through the top edge. Next roll out the dough toward you, rolling through the edge closest to you, repeat it until dough around 30cm long.
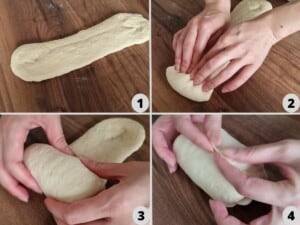
- Flip the dough again, smooth side on the bottom. Take the centre end of the dough furthest away from you. Then roll it back towards you. You want this not too tight and not too loose. Once you have your roll, pinch the end to seal it.
- When placing the dough in the tin you want the seal to face the edge of the tin. On the left side of the tin the swirl end, should face the tin and the same on the right. Make sure all the seals are placed on the bottom.
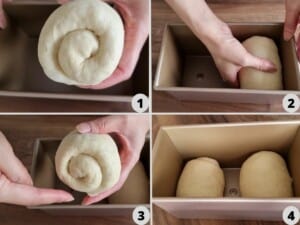
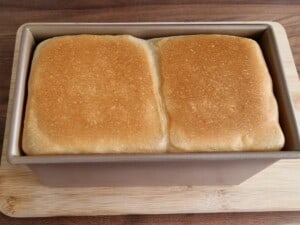
- Final proof: Let the dough rest in warm place for 60 minutes or until proof 90% of the tin cover with wrap or plastic bag.
- Preheat the oven to 230°C(without the lid 210°C).
- Once dough has proof put the lid on, then put it into the oven change the temperature to 210°C bake for 23 - 25 minutes. (without lid 190°C, bake for 20 – 25 minutes). Depending on your oven you may need to adjust the temperature.

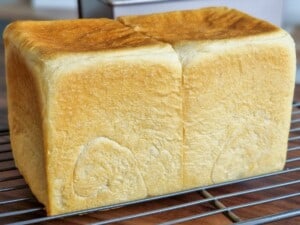
- Once you have removed the bread form the oven, give the tin a gentle tap on the work surface. This will allow any extra steam or moisture to escape and stop being trapped inside.
- Move the bread on to the rack and leave to cool down completely.Enjoy your bread.
Video
Notes
You can keep the Yudane in the fridge for up to 3 days.