
These are the perfect hot dog buns for a summer BBQ and picnic. The bread is so fluffy and soft. In this recipe I use very simple ingredients to create a light texture to go well with any filling. Also I add some wholewheat to give it lovely flavour .
I have a confession to make. I don’t buy bread from the store. If you’ve been following my blog, you may have noticed that all of my recipes use homemade bread. It’s not because I’m a health nut or because I’m trying to save money (although both are true). It’s because homemade bread tastes better!
Why bake hot dog buns at home?
Baking your own at home allows you control over what goes in your food. You know exactly what is going into your food, and how much sugar there is in it. You can choose organic ingredients and avoid all those extra chemicals.
How to store:
Using a ziplock bag or air tight container you can keep the bread for 3 to 4 days. You could also freeze the bread for up to one month. When it’s time to eat them, take out of freezer, and leave it to defrost. You also pop the bread in the oven 160-180°C for 10 minutes (depending on your oven you may need adjust the time). If you don’t want the top of bread too dry you can spray with a little water and cover with foil.

Fillings to try
- Hot Dog Sausage / Frankfurter with fried onions, ketchup & English mustard.
- Egg mayo which is 3 tbsp Japanese mayonnaise, 1 tsp Mustard and 20g diced onion and
2 boiled eggs and mix them well (this will fill 2 to 3 buns) - Japanese yakisoba, you can just buy instant yakisoba noodles, or check my yakisoba recipe to make your own.
These soft and fluffy hot dog buns are perfect for your next BBQ or summer party!

Hot Dog Buns
Equipment
- 1 Mixing Bowl
- 1 Bread Cutter
- 1 Spatula
- 1 Baking Tray
Ingredients
- 160 g Bread Flour(80%)
- 40 g Wholewheat Flour(20%)
- 8 g Skimmed Milk Powder(4%)
- 4 g Salt(2%)
- 4 g Quick Yeast(2%)
- 20 g Caster Sugar(10%)
- 130 g Water(65%) If it is a warm day then just use room temperature water, otherwise if its a cold day you should use warm water around 25C-30C.
- 20 g Unsalted Butter(10%)
Instructions
- In a mixing bowl add the bread flour, then in separate areas of the bowl add in the wholewheat flour, skimmed milk powder, salt, yeast & sugar. Using your hand or spatula, give all the dry ingredients a good mix. Next add in the water and again using your hand or spatula, mix until there are no dry bits in the bowl.
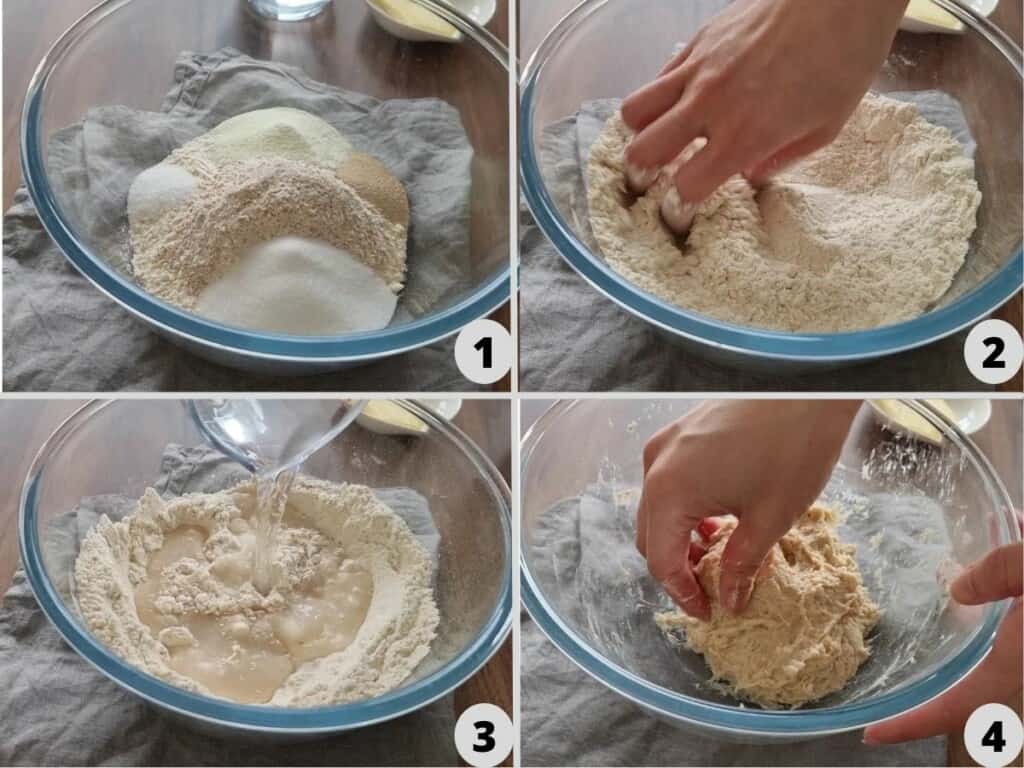
- Once the dough has gathered together, turn it out onto the work surface and start to knead it for 10 minutes to 15 minutes or until the gluten has formed.

- Spread the dough and add the butter, cover it with dough then start to knead it again. It will become sticky and spread on the work surface. Use the bread cutter to gather the dough and continue to knead it for around 5 to 10 minutes or until it becomes smooth.
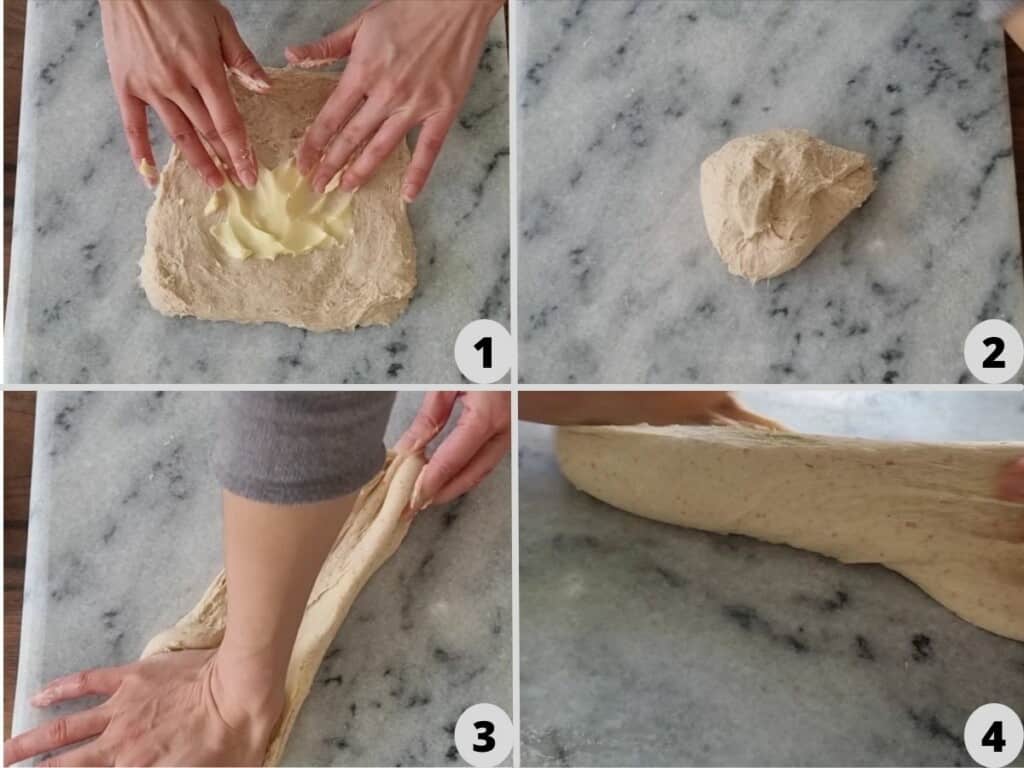
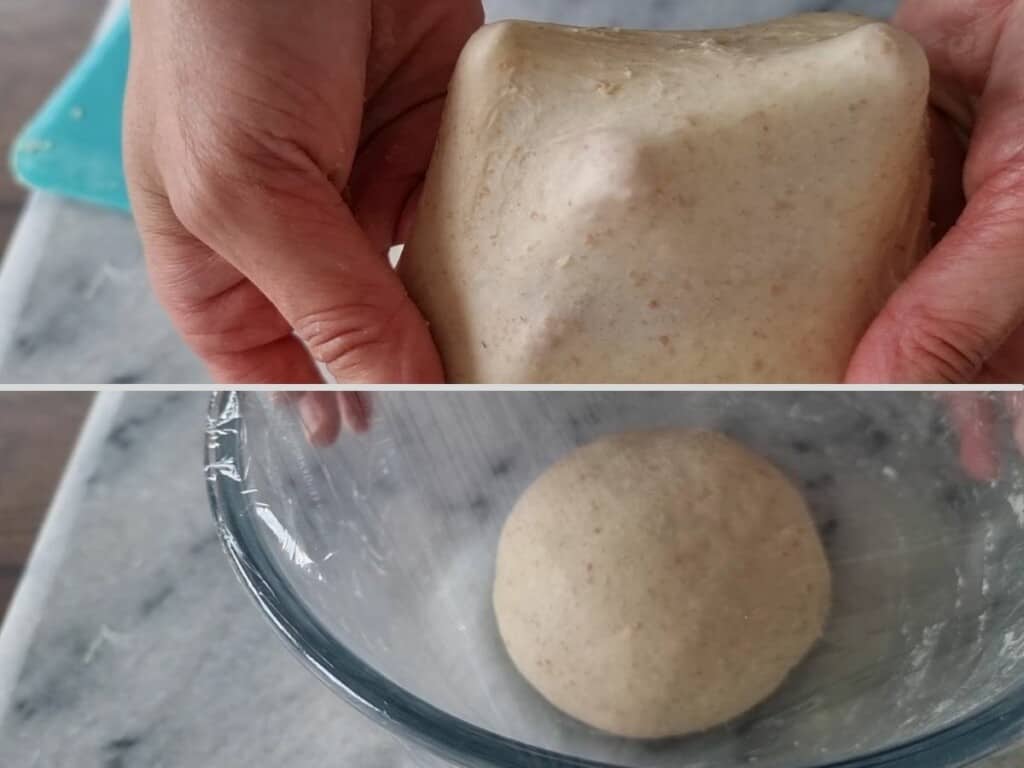
- Once the dough becomes smooth, cut a piece of the dough and spread it very thin, if you can see your finger though the dough, and it does not break easily, this means the gluten is ready. Next roll it into a ball and put it into a bowl and cover with wrap or a plastic bag to prevent to dough from drying out. Put it in a warm place to do the first rest for 40 to 60 minutes or until it doubles in size.
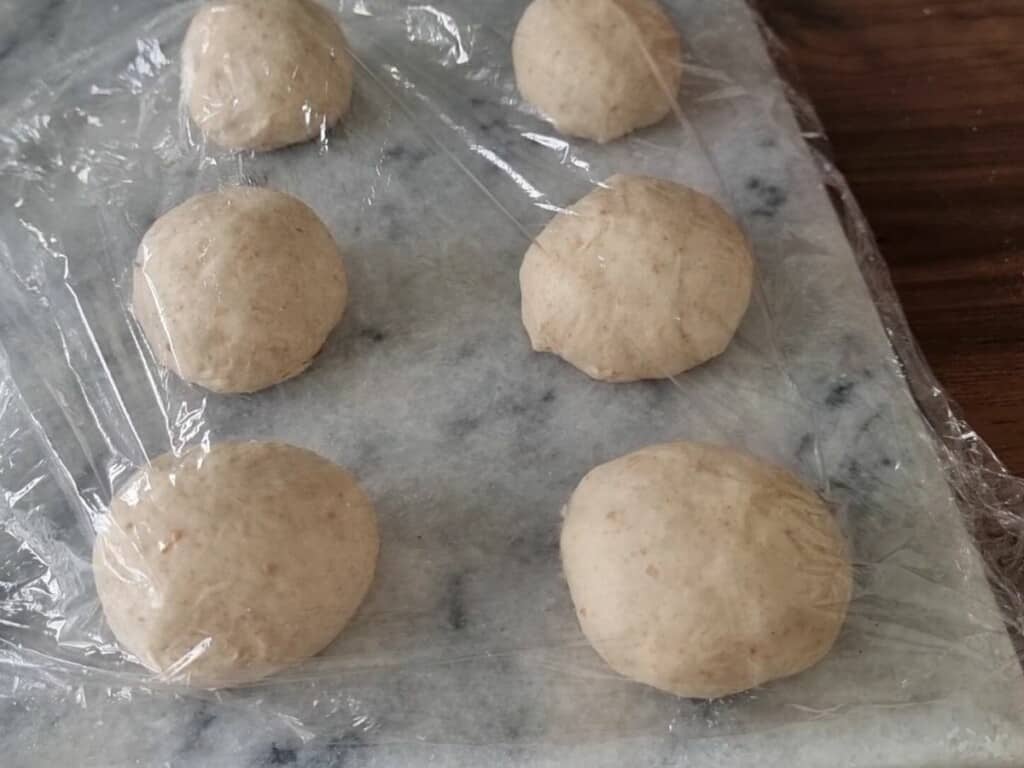
- Finger test (see notes) to check if the dough has rested enough. If the dough has rested enough, dust the bread flour on the surface, turn it out onto the work surface. Use your hand gentle push the air out and divide into 6 equal pieces. Next shape each piece into a small ball.

- Then leave them on the work surface and allow to rest for 15 minutes, cover with wrap.
- Turn one bun over and flatten. Fold the top righ of the rectangle one-third of the way towards the middle, pressing it into the dough. repeat with the top left and repeat until rolled up.
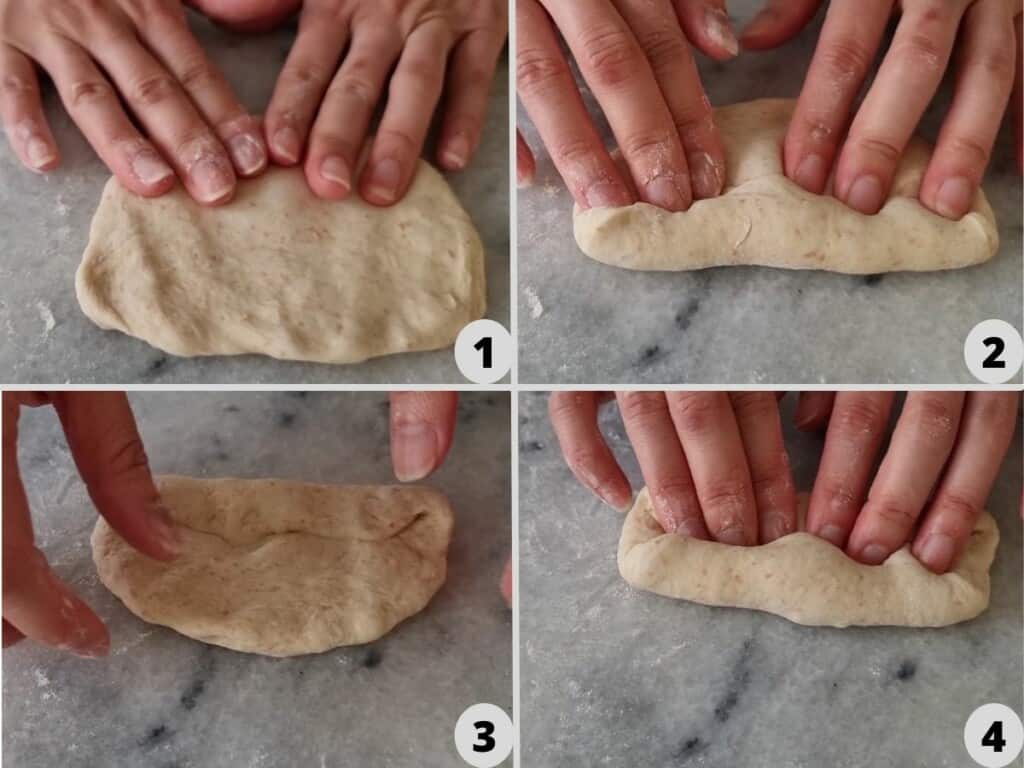
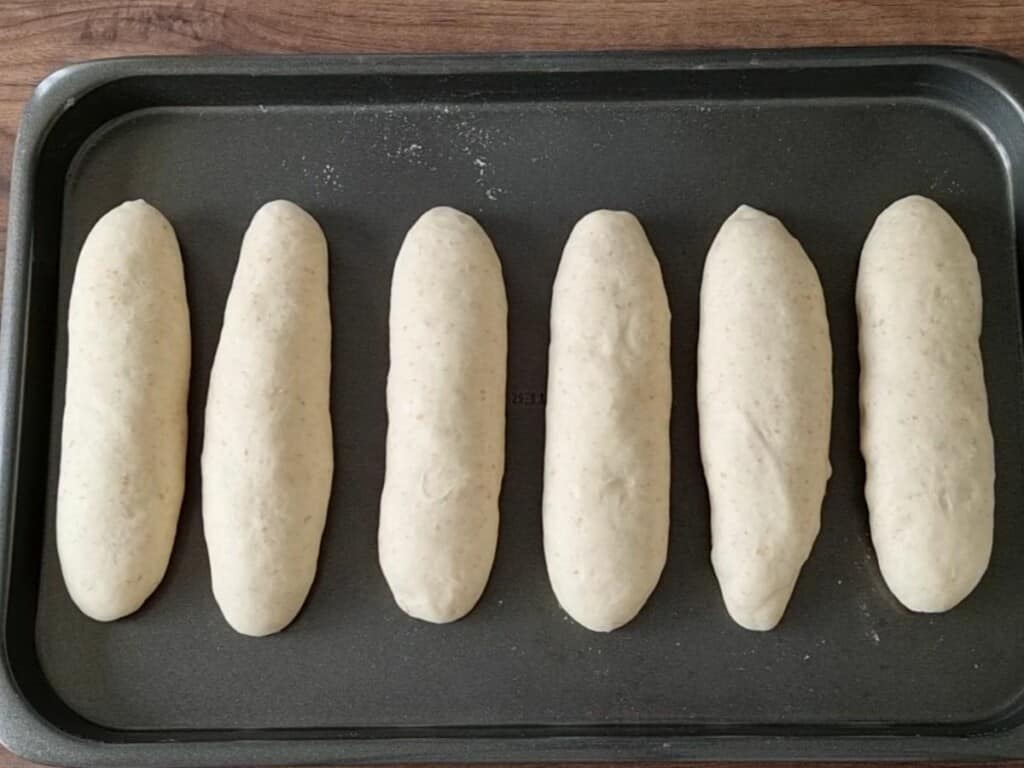
- Roll the dough between your hands until it is shaped into a sausage. Then line up on the tray.

- Put it in a warm place and cover with the rap or a plastic bag for 40-60 minutes or until doubled in volume.
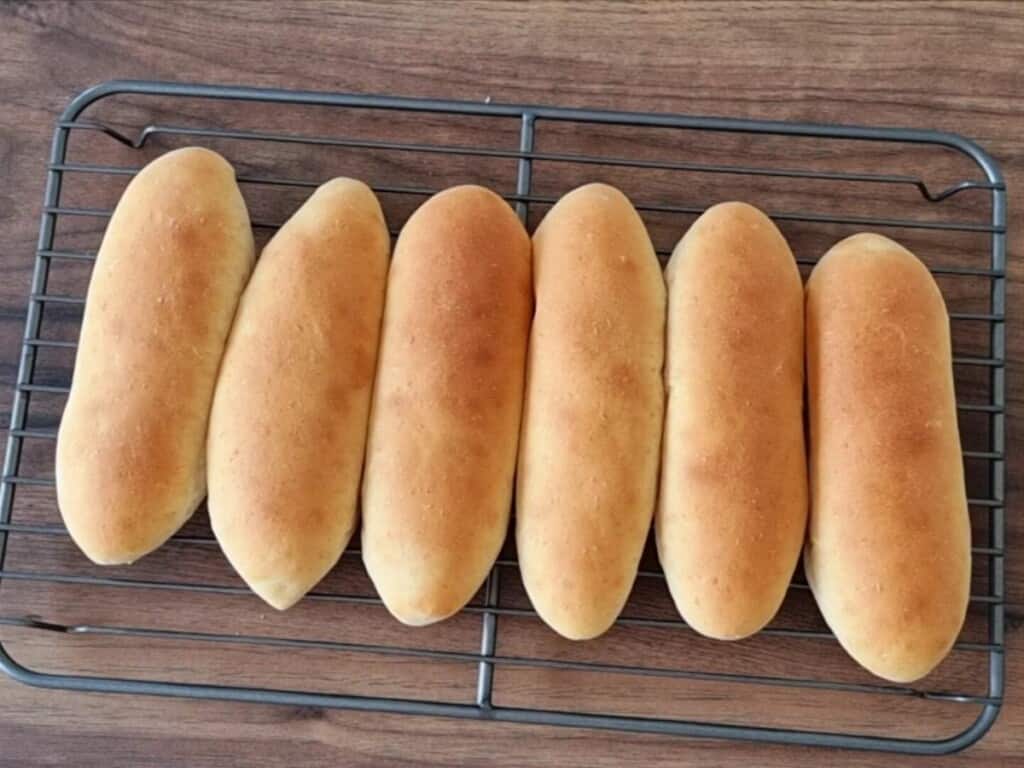
- Preheat the oven to 220°C, Once they be proofed, put it into the oven change temperature to 200°C, bake for 10 to 13 minutes or until bread becomes a lovely colour. Once you have removed the bread from the oven, give the tray a gentle tap on the work surface. This will allow any extra steam or moisture to escape and stop it being trapped inside.
- Next its up to you how to fill these delicious rolls! Enjoy.Share your filling ideas in the comments below.