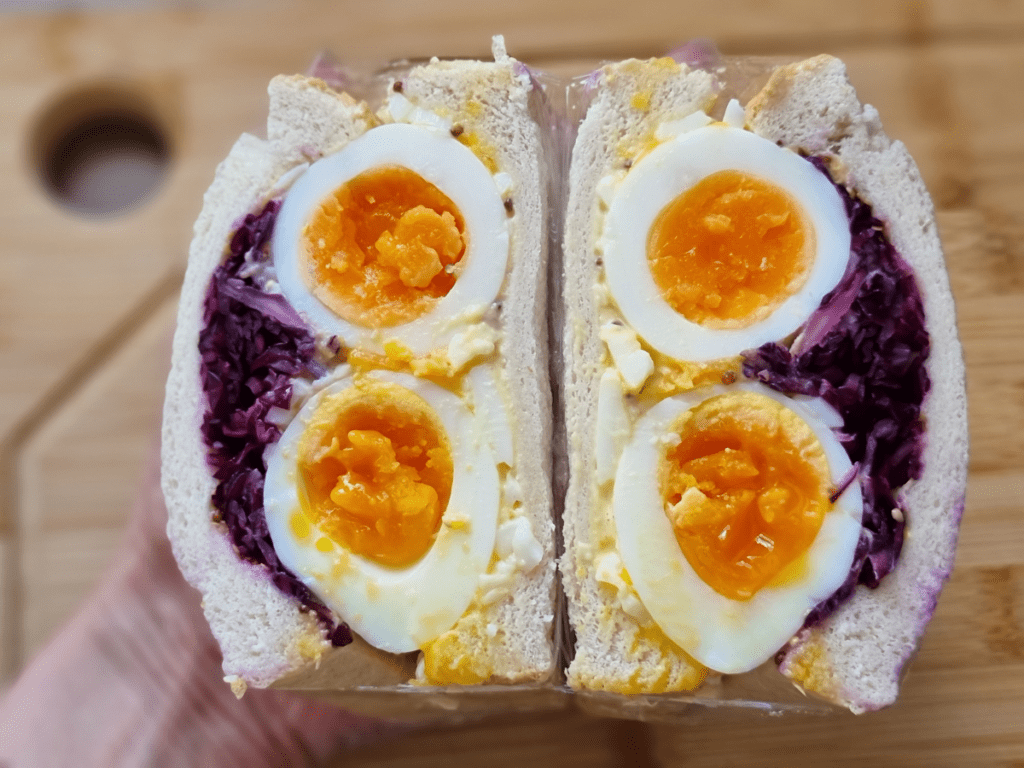
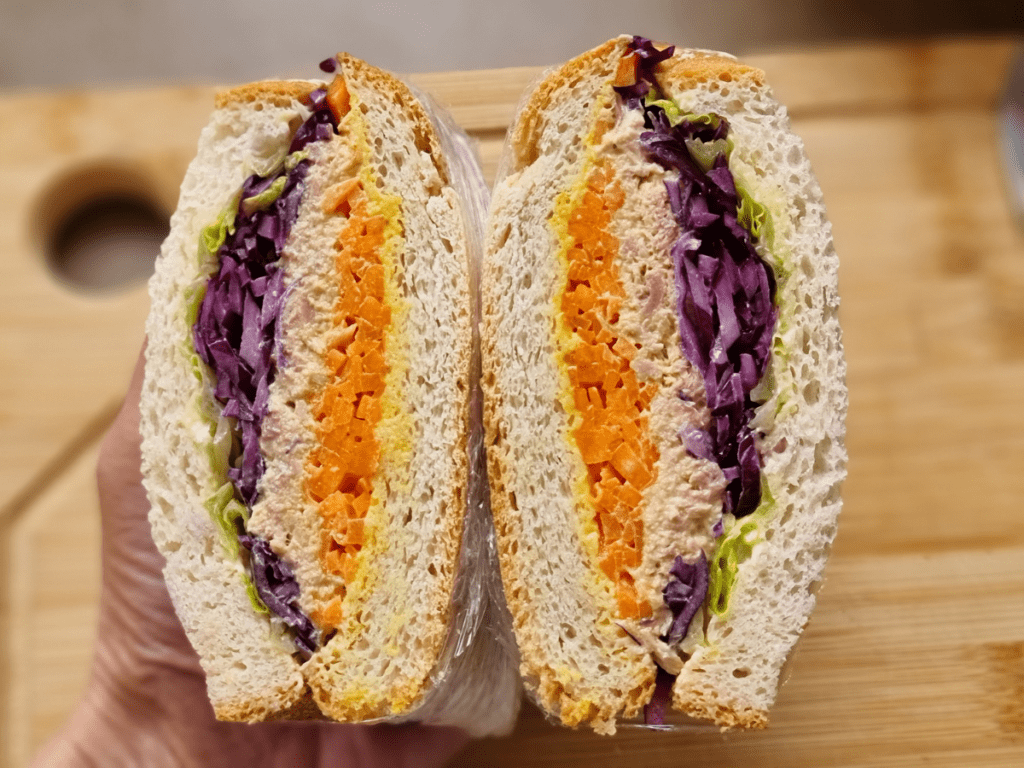
Wanpaku Sandwich (わんぱくサンド) is a popular Japanese children’s sandwich. It is made with two thin slices of bread and filled with a variety of ingredients, such as ham, cheese, egg, or tuna. The sandwich gets its name from the Japanese word “wanpaku” (わんぱく), which means “naughty” or “mischievous.”
This is because the sandwich is easy to make and can be quickly put together using leftovers. In this blog post, we will give a detailed overview of the history and meaning of the wanpaku sandwich, as well as provide some helpful tips on how to make it at home!
A little history of the Wanpaku Sandwich:
It is said to have been invented by a Japanese chef named Kiyoshi Kimura in the early 1920s. At the time, there was a growing demand for quick and easy meals that could be prepared in a short amount of time. The sandwich quickly became popular, and soon began appearing on restaurant menus across Japan.
Why are they deep filled?
Wanpaku sandwiches are typically deep-filled, meaning that the ingredients are piled high and go almost to the edge of the bread. This is because it is easier to eat a sandwich when all of the ingredients are together in one bite. It also prevents the filling from falling out or becoming messy.
What’s in a wanpaku sandwich?
The most popular fillings for wanpaku sandwiches are ham, cheese, egg, and tuna. However, you can use any type of filling that you like! Other popular choices include chicken, bacon, lettuce, tomato, avocado, and cucumber.
Colors are important too!
Why are colors important?
When making a wanpaku sandwich, it is important to use bright and colorful ingredients. This is because the colors are said to symbolize happiness and good luck in Japan. So be sure to add some red pepper, green lettuce, and yellow cheese to your sandwich for a touch of Japanese culture!

Wanpaku Sandwich
Ingredients
Pickled Red Cabbage
- ¼ Red Cabbage (Sliced Thinly)
- ½ tsp Salt
- 1 ½ tbsp Honey
- 1 tbsp Vinegar
- Juice of half a Lime
Pickled Carrot
- 2 Carrots (Sliced Thinly)
- ½ tsp Salt
- 1 ½ tbsp Honey
- 1 tbsp Vinegar
- Juice of half a Lime
Avocado Sandwich’s ingerdients
- 2 slices Bread
- ½ ⅓ Avocado
- 4 slices Brie Cheese (or any you like)
- 7 Lettuce leaves sliced thinly
- 2 tbsp Kewpie Mayonnaise
- 1 tsp Mustard
Tuna
- 2 slices Bread
- 80 g Tinned Tuna (I recommend Rio Mare)
- 1 ½ tbsp Kewpie Mayonnaise
- 1 tsp Mustard
- 1 pinch Salt and Pepper
Egg
- 2 slices Bread
- 4 Eggs
- 2 tbsp Kewpie Mayonnaise
- 1 tbsp Mustard (Preferably Wholegrain)
- 1 pinch Salt and Pepper
Instructions
Pickled Red Cabbage and Carrot
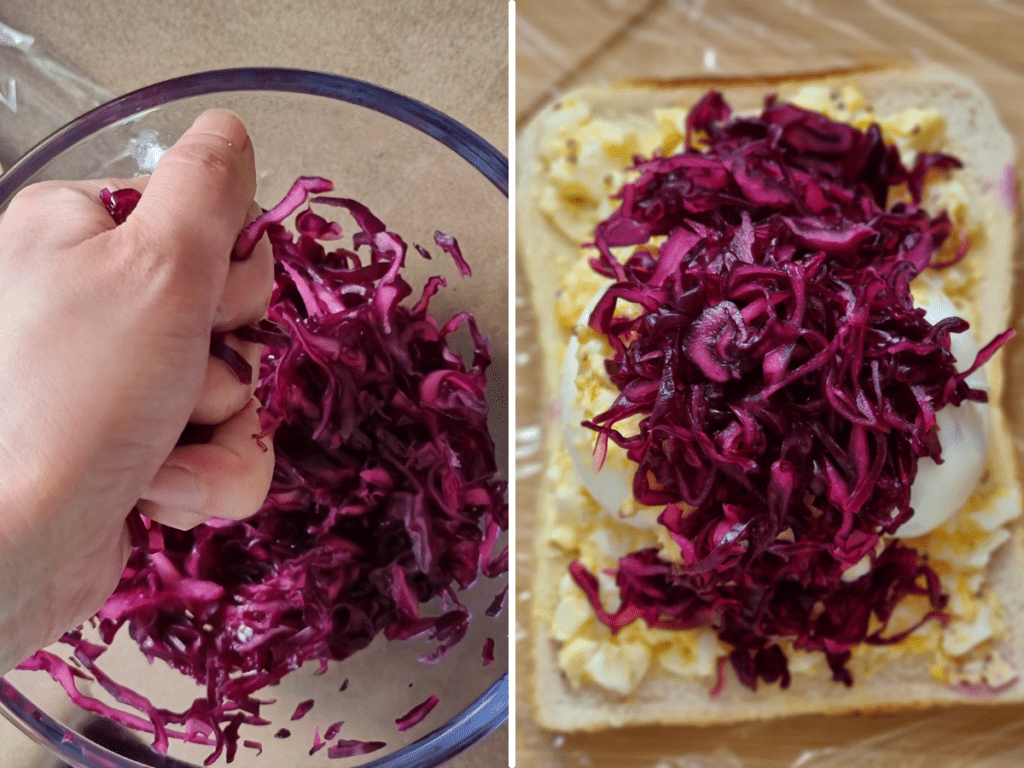
- Add the sliced cabbage into a bowl and add the salt mix it will, then leave it for 10 to15 minutes, squeeze out the water.
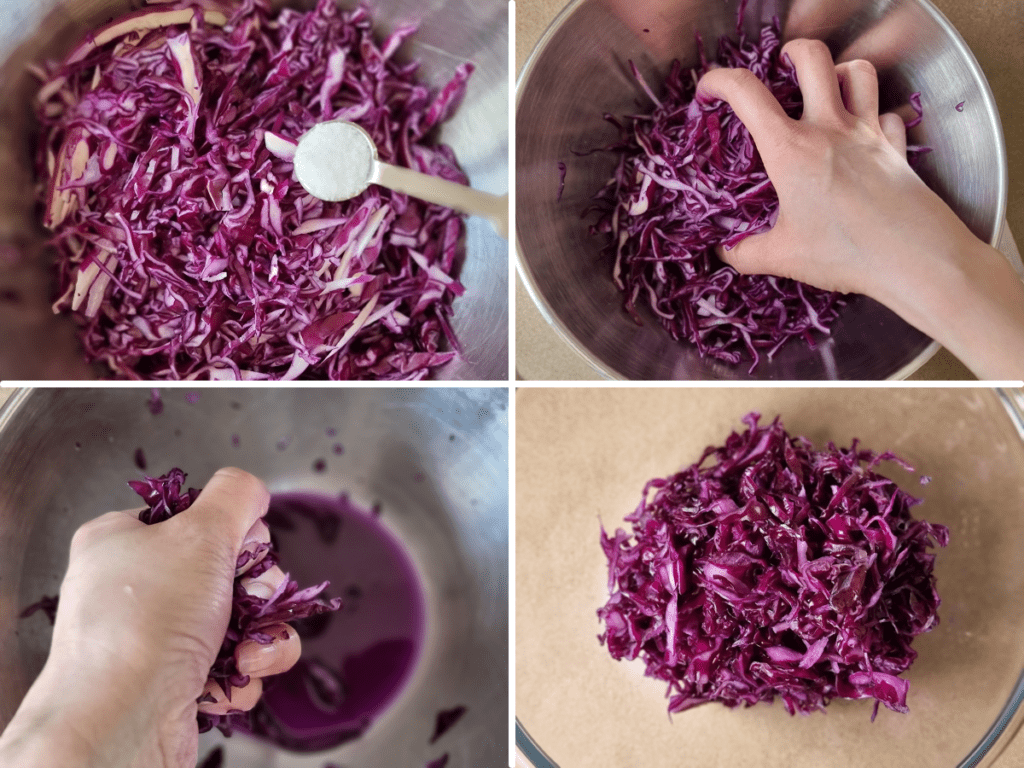
- After 15 minutes, remove the extra water, add the the Honey, Lime Juice and Vinegar, mix well then leave in fridge for 30 minutes, ready for later.
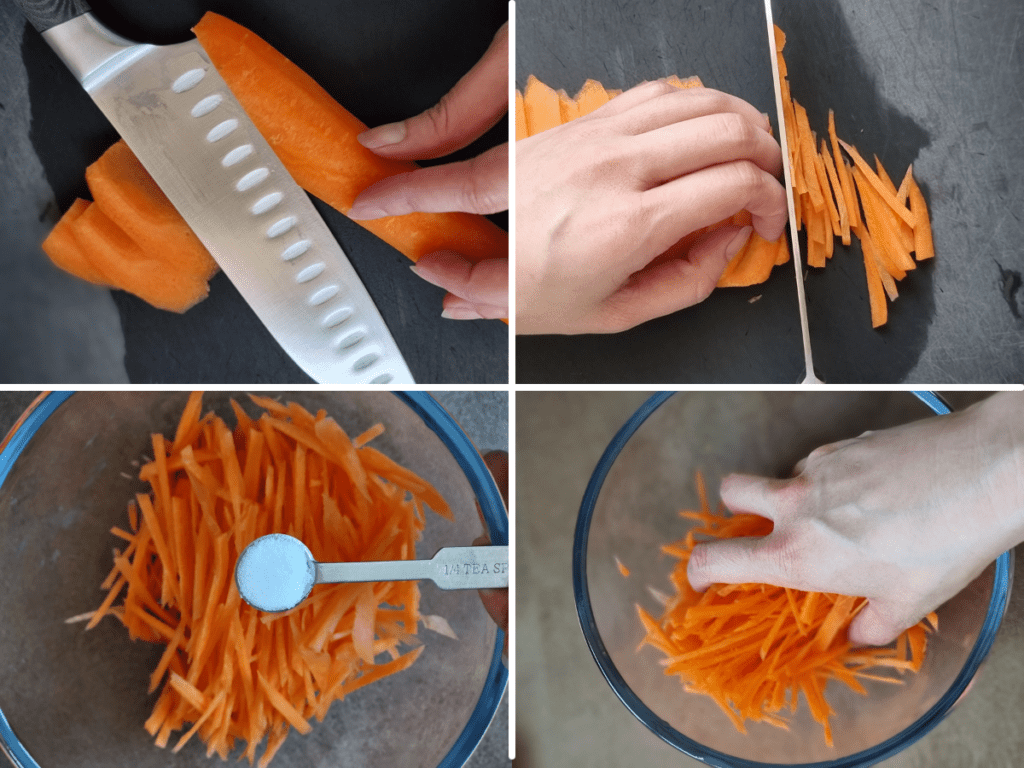
- Slice the carrot very thinly and add the salt leave it for 10 to 15 minutes, squeeze out the water. Add the the Honey, Lime Juice and Vinegar, mix well then leave in the fridge for 30 minutes, ready for later.
Prepare ingredient
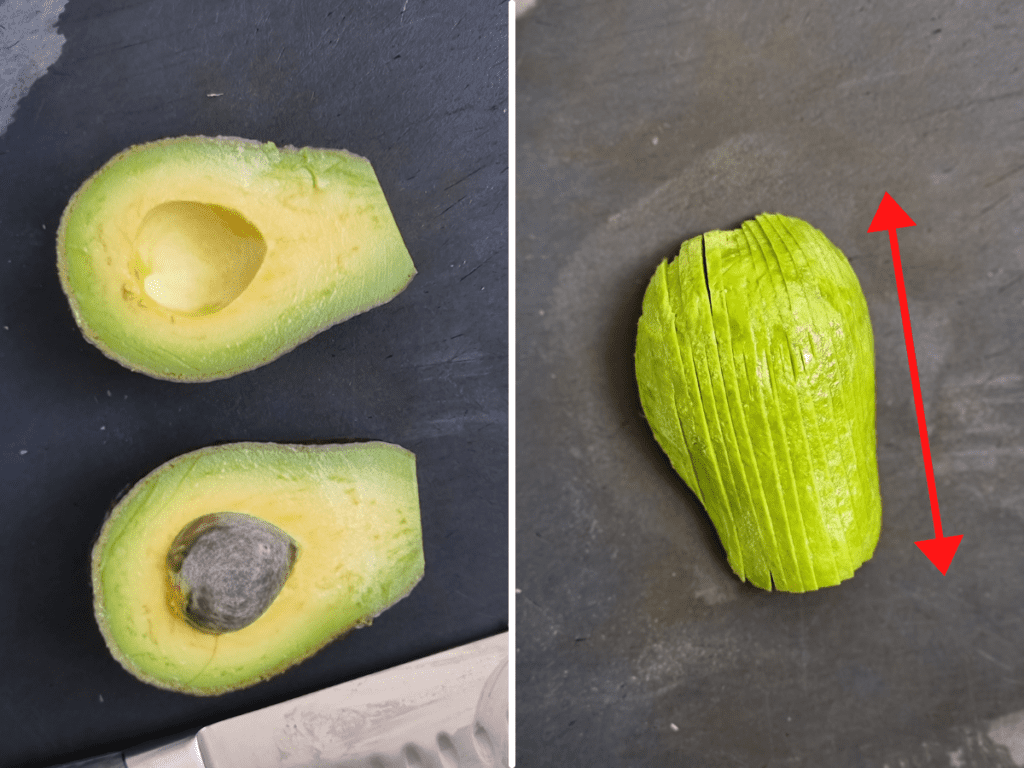
- Cut the avocado into half and slice length ways. (the other half save for later)
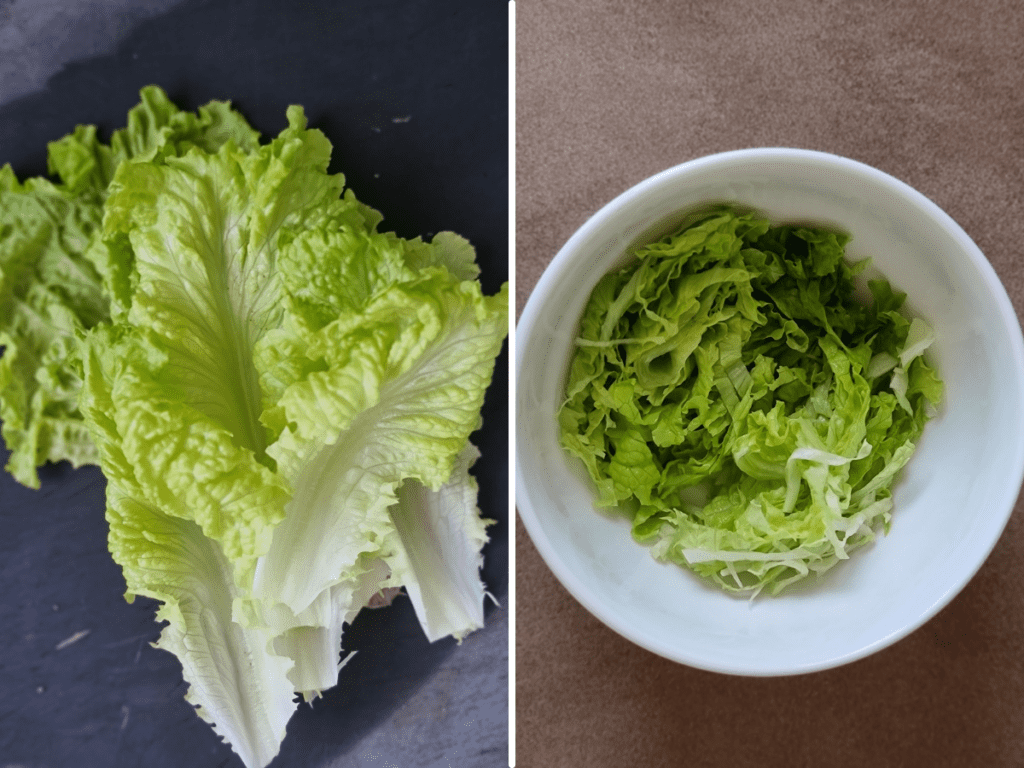
- Slice the lettuce, ready for later
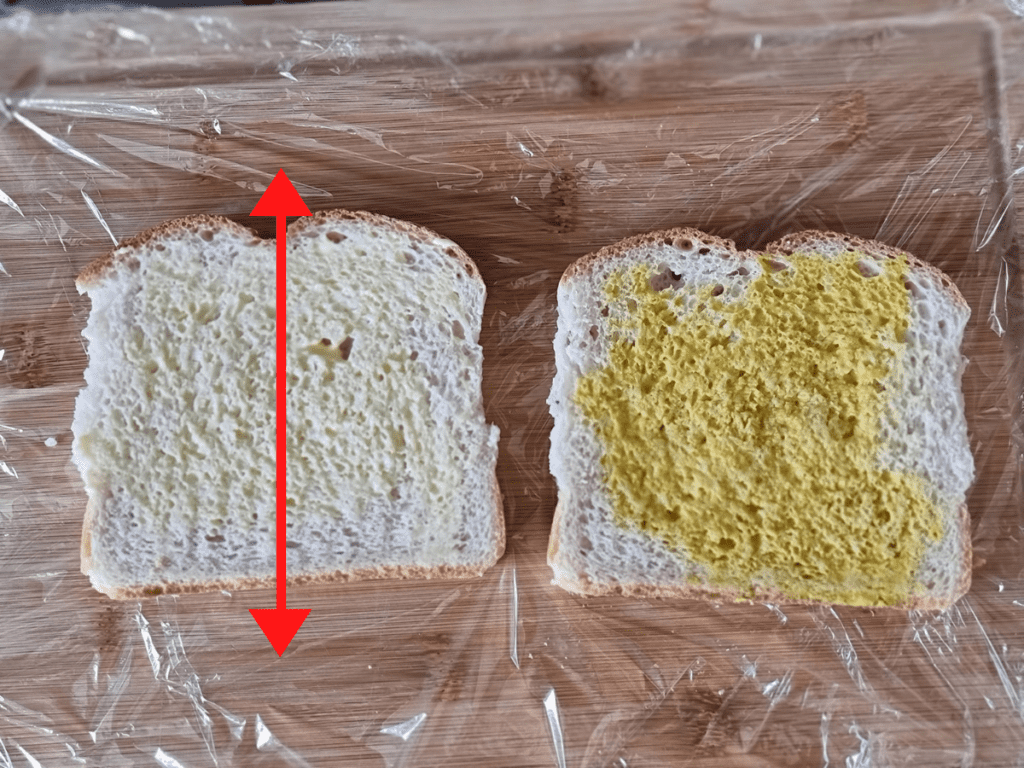
- Add the mayonnaise on one slice of bread and on the other add the mustard, and make sure which way you are going to cut it, later.
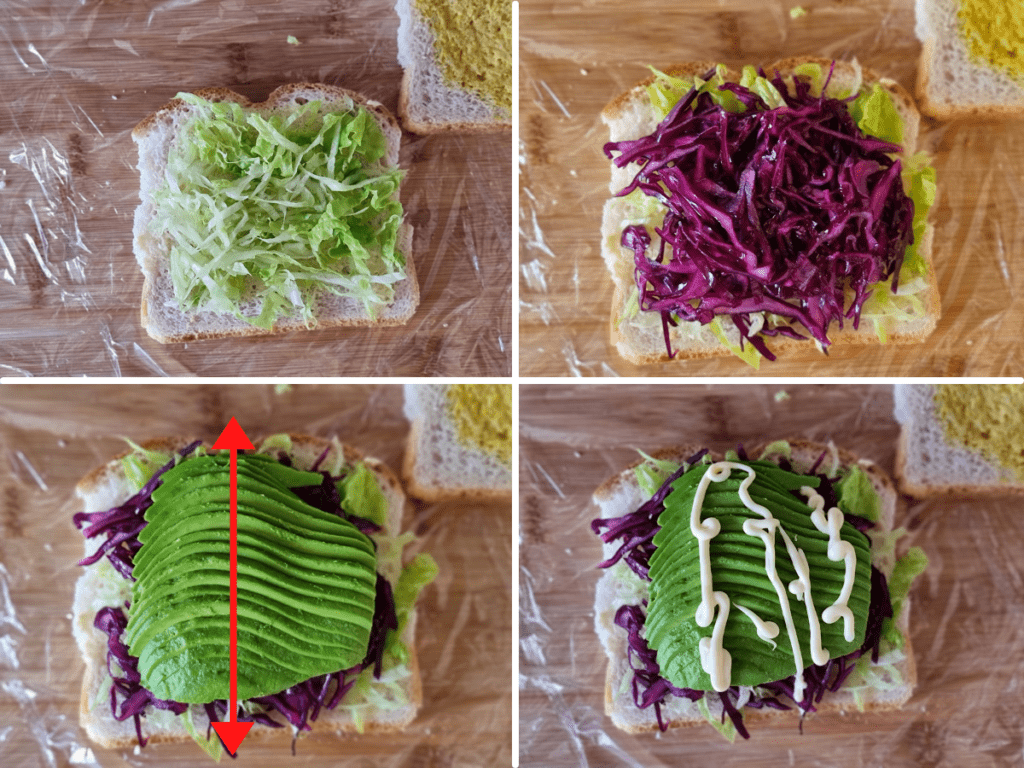
- Fist add the Lettuce, red cabbage, avocado then 1tbsp mayonnaise on the avocado.(don’t forget which way you will cut) Make sure your avocado is laid the right way.
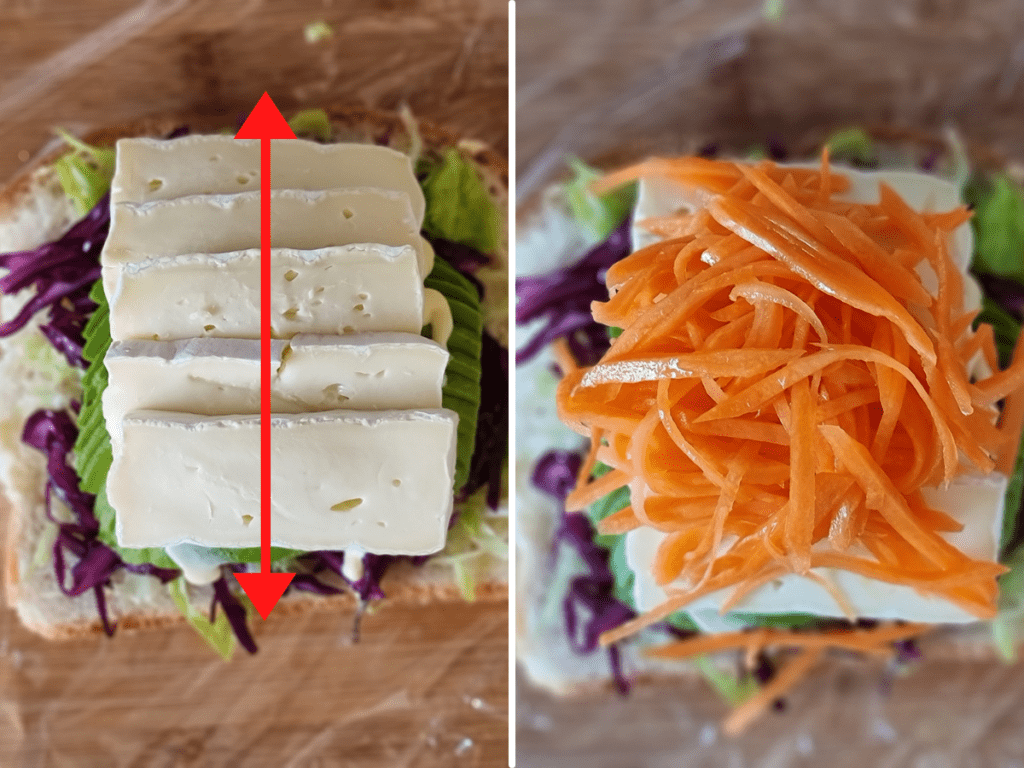
- Then add the cheese laid in the same direction as the avocado, then finally add the carrot.
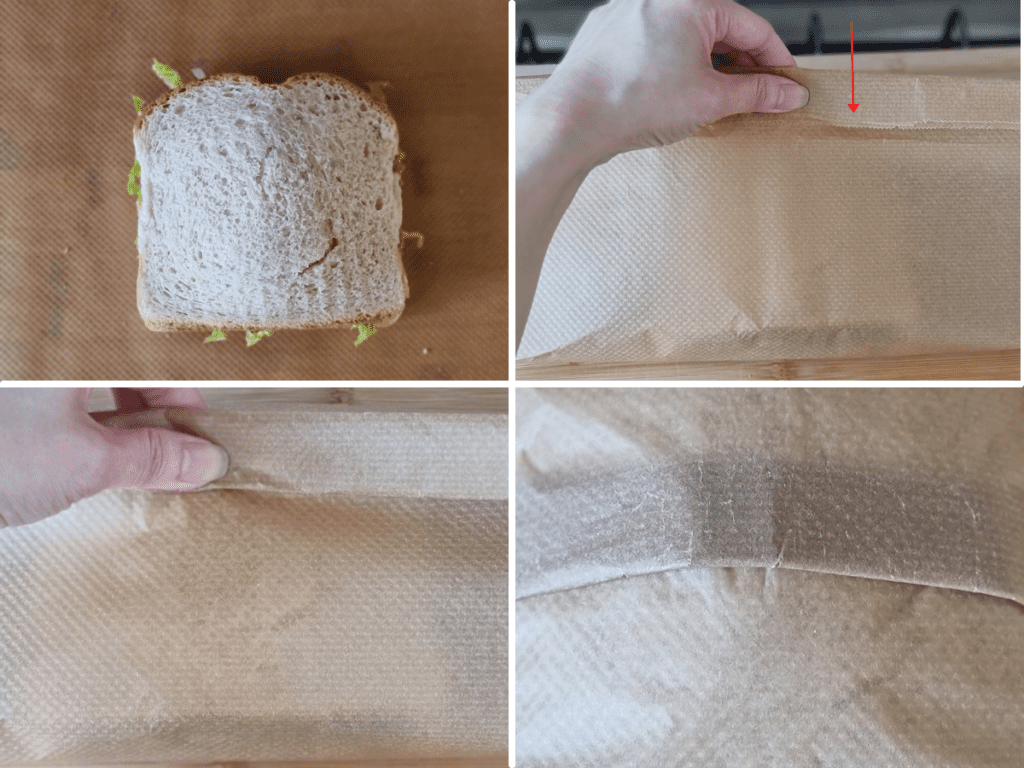
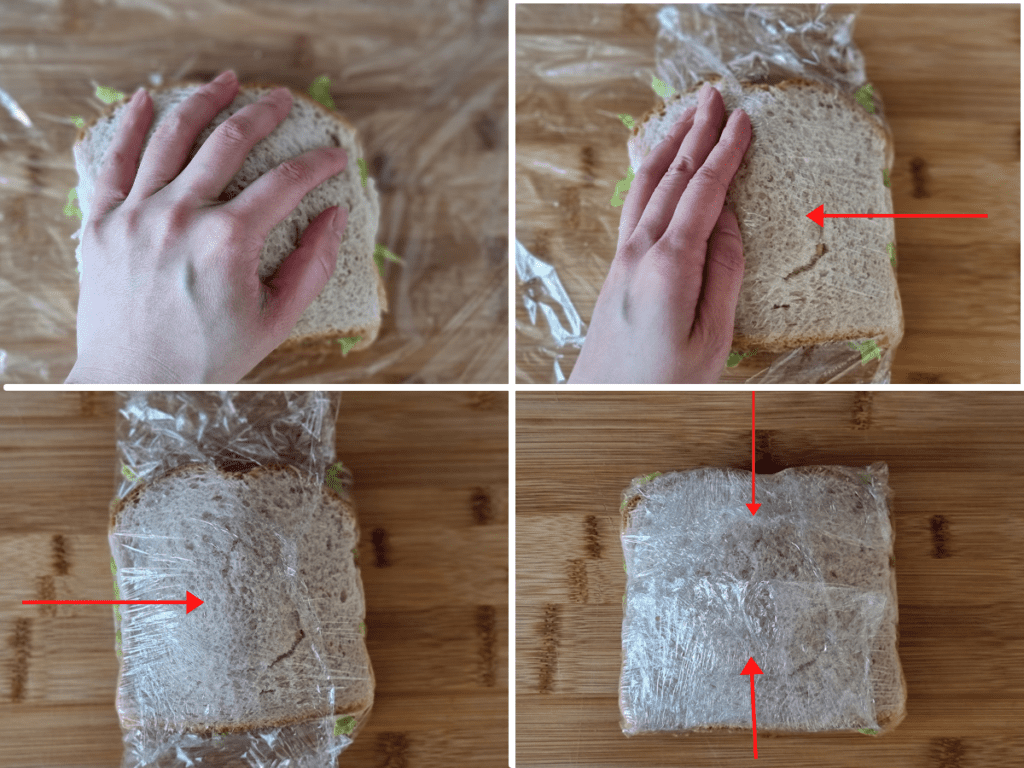
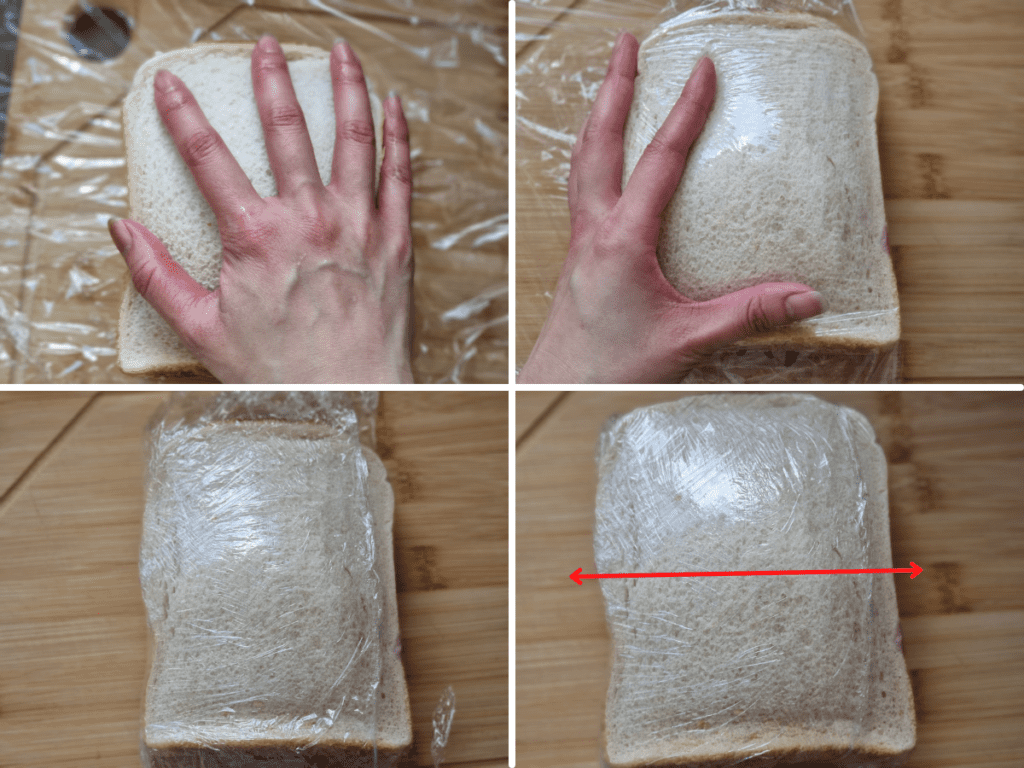
- Put the other slice of bread on top, then place the backing sheet under the bread and begin to fold. Firstly fold over the top and bottom so they meet in the middle. Fold the middle section in on itself, as the photo shows, until tight.
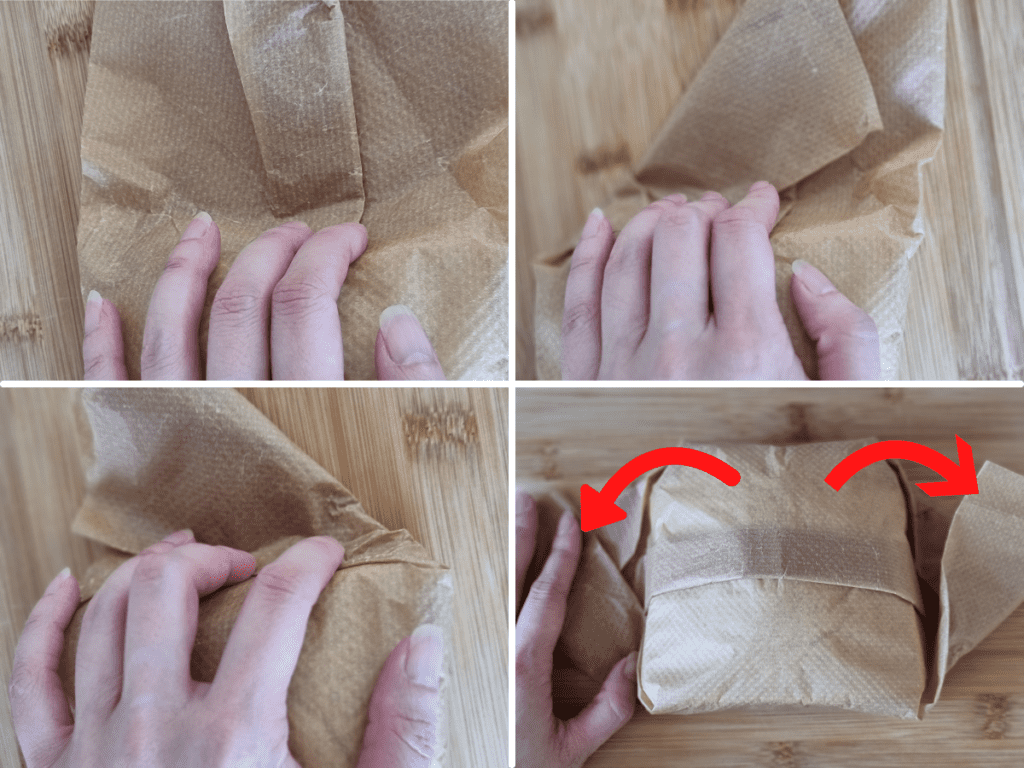
- Next fold the outer edges into triangle shapes, as you would when wrapping a gift. Then fold these under the sandwich.
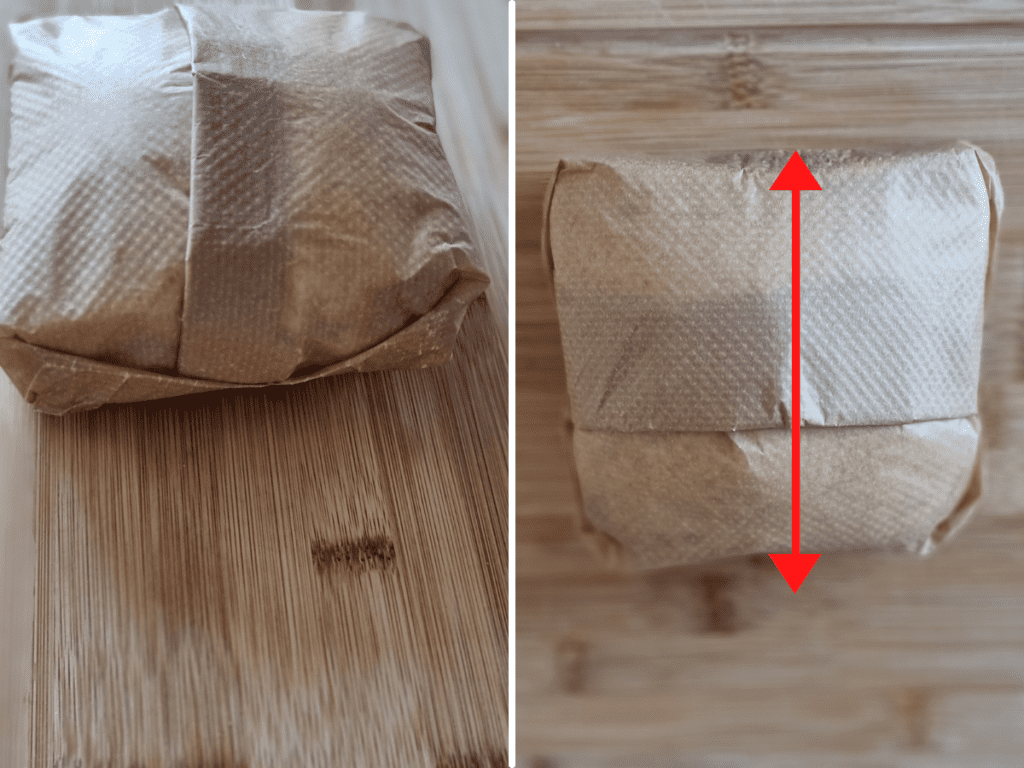
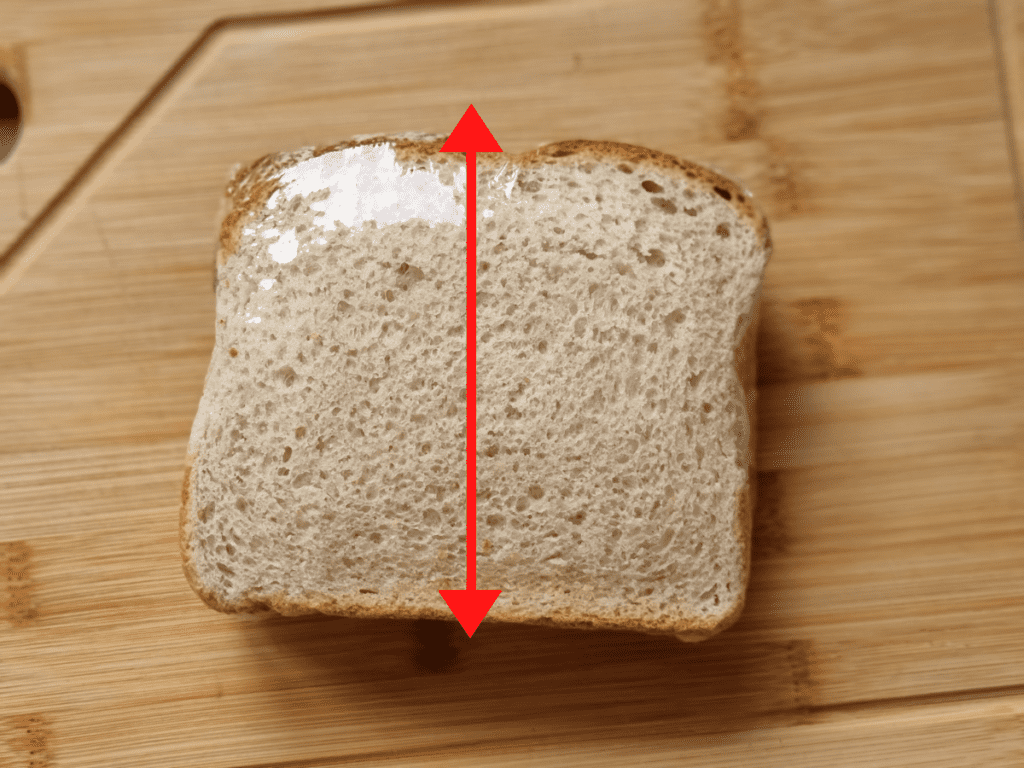
- Then you will cut across the sandwich to get the best effect, you must remember which way you wrapped it.
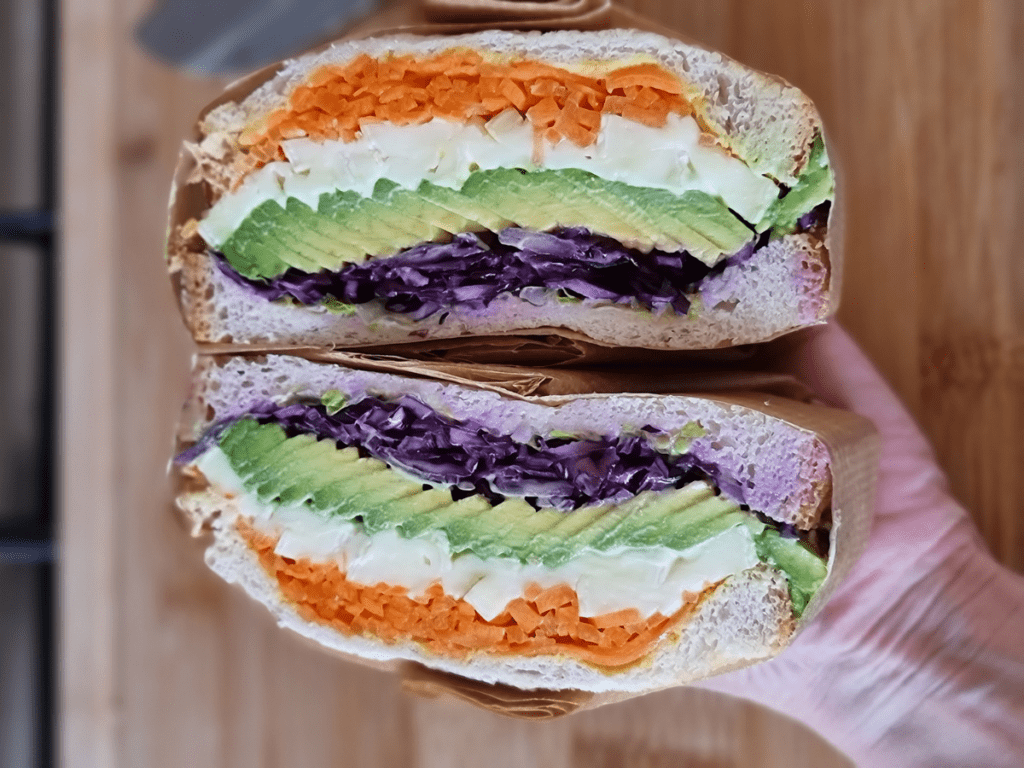
- You will get a wonderful surprise when you cut through and see the sandwich. Enjoy your meal.
Tuna
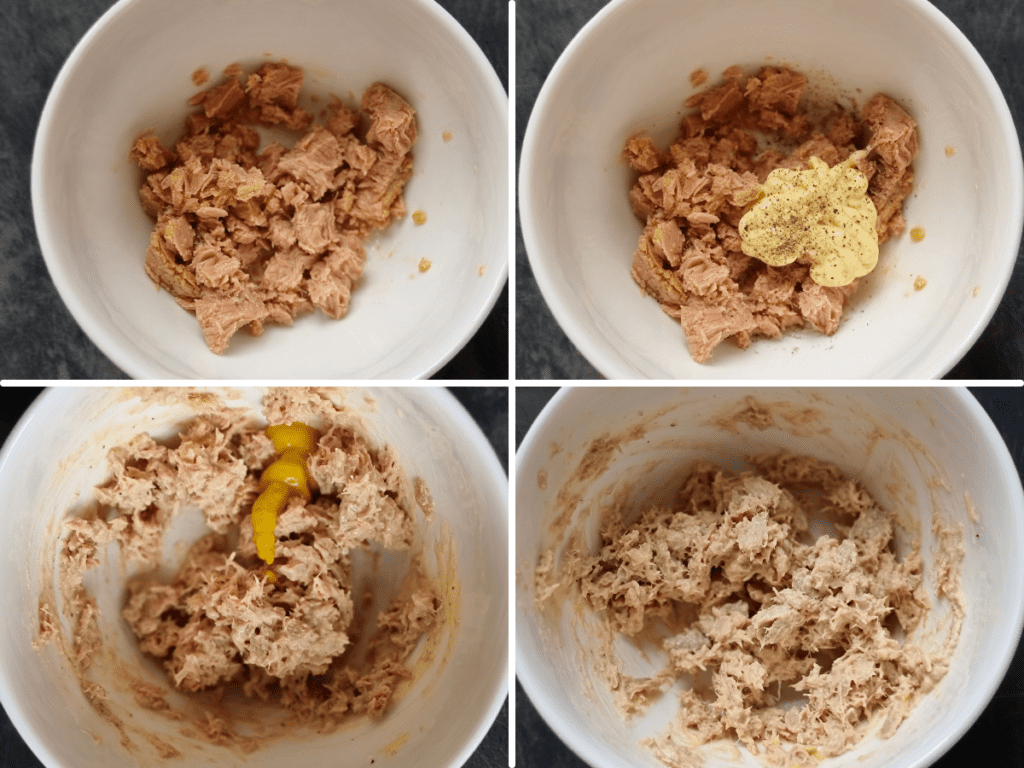
- Add the Kewpie Mayonnaise, Mustard, Salt and Pepper, then mix it well.
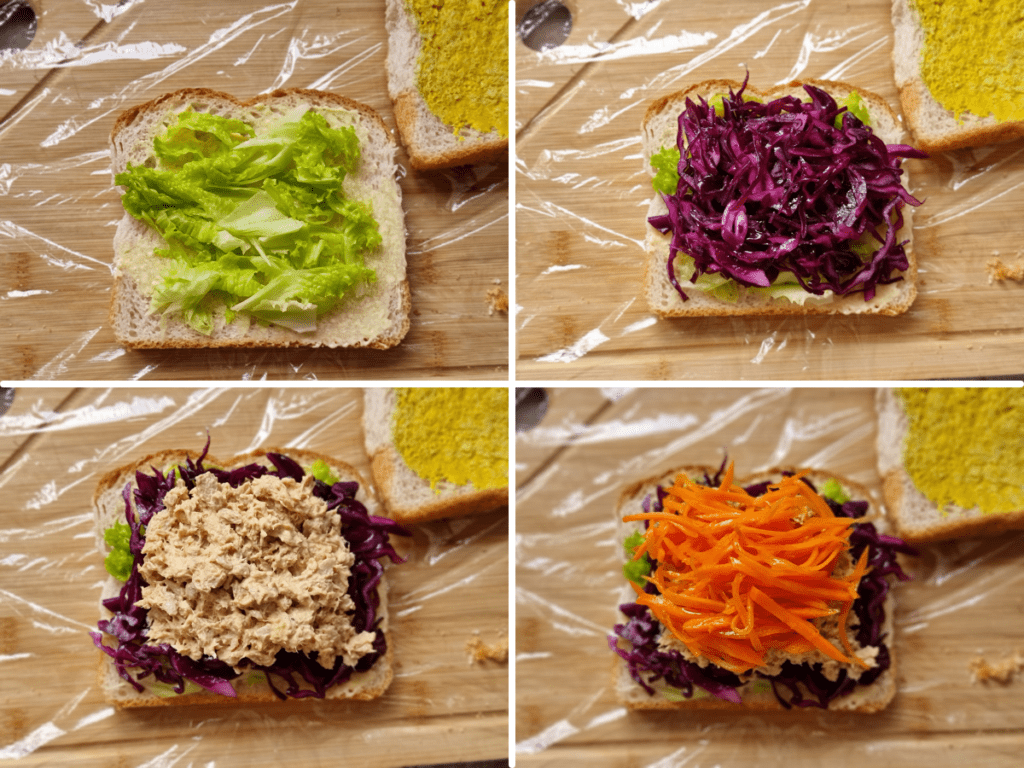
- Put the wrap on the table or chopping board, ready 2 pieces of bread add some Kewpie Mayonnaise on one piece of bread another one use mustard ( or you could just use butter, this is not in the recipe), then add the lettuce, pickled cabbage, tuna and pickled carrot.
- Put the other slice of bread on and press it lightly then wrap it as the picture.
- Then cut it into half.
- Enjoy it.
Egg Sandwich
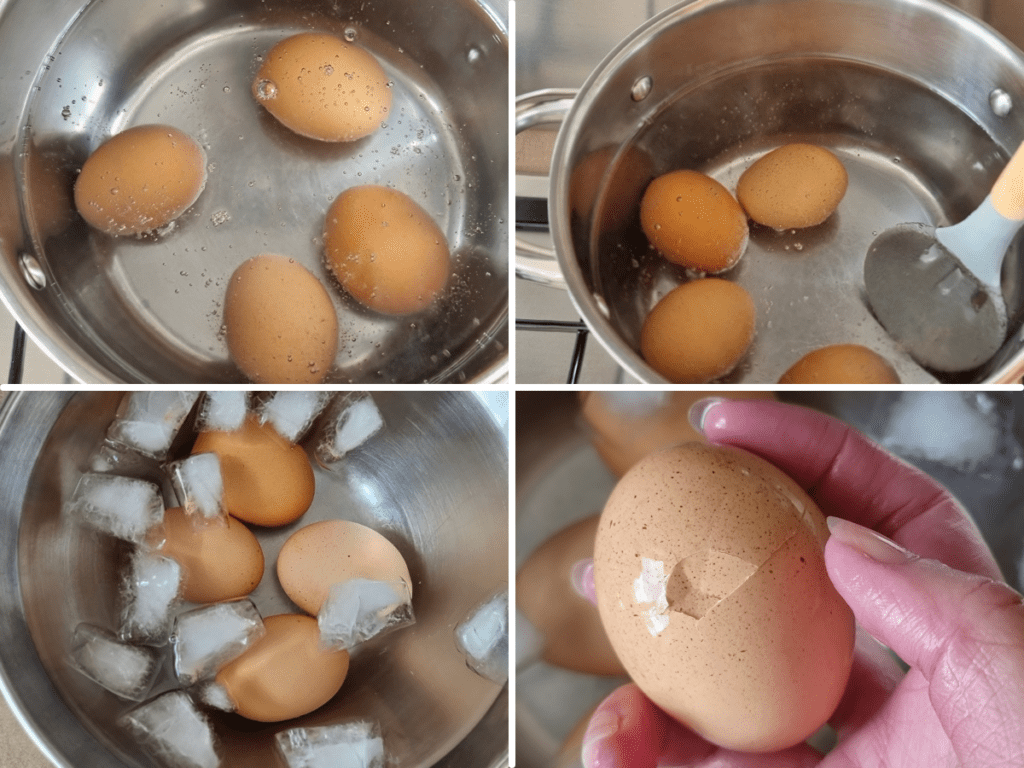
- Boil the water, once it be boiled add the eggs int to boil water for 7 minutes. Add ice and cold water to a bowl, once the eggs have boiled for 7 minutes, put them in the cold water for 5 minutes. Next you need to peel all the eggs.
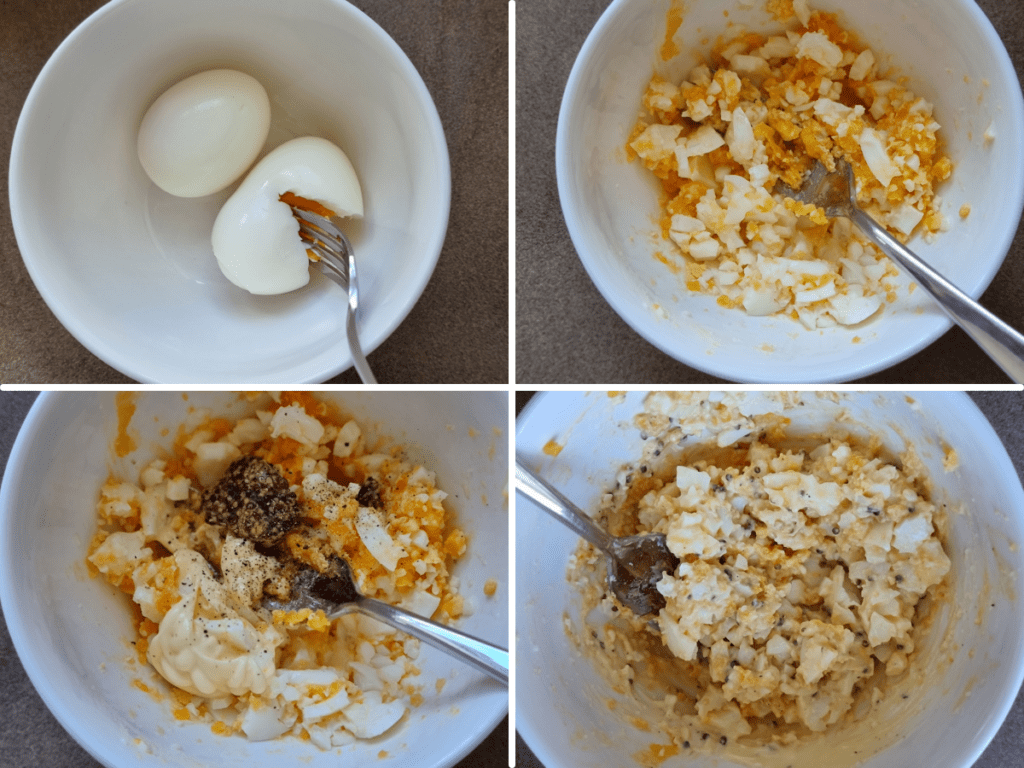
- Mash two eggs and mix with Kewpie Mayo, mustard, salt and pepper.
- Lay the bread on food wrap, on one piece add mayonnaise and the other, wholegrain mustard. Spread on the mashed egg, then two whole eggs. Remember where you will slice.
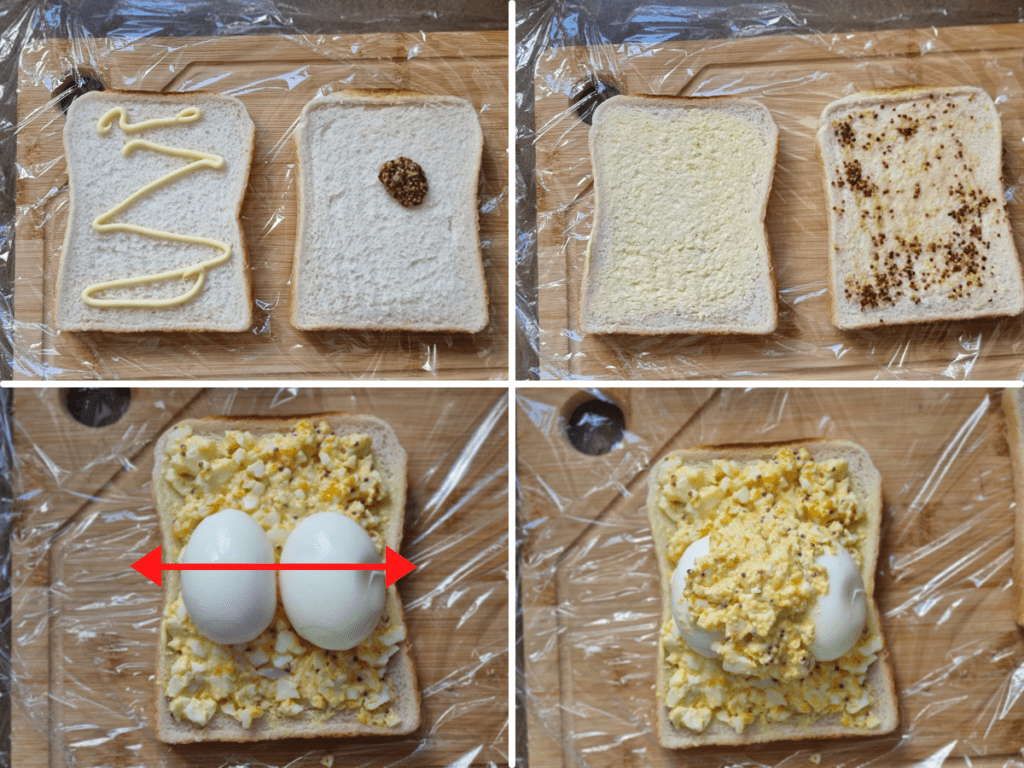
- Next add a good portion of pickled cabbage.
- Place the other piece of bread on the top and wrap the sandwich tightly in the food wrap. Slice across the whole eggs.
- I hope you enjoy the sandwiches, please share any other fillings you try.
